

Hardware break fix work in the field comes down to one sequence: diagnose remotely, get the right part to the right place, send an engineer to swap it, prove the swap with serials and photos, and send the old part back. Most failed visits break one link in that chain, usually before the engineer has even left home.
This post walks through that workflow for TPM and OEM tickets: parts logistics, serial capture, dead-on-arrival parts and returns. It assumes you already know the model. The question here is how to run the part swap so fewer tickets need a second visit.
How a hardware break fix ticket runs, start to finish
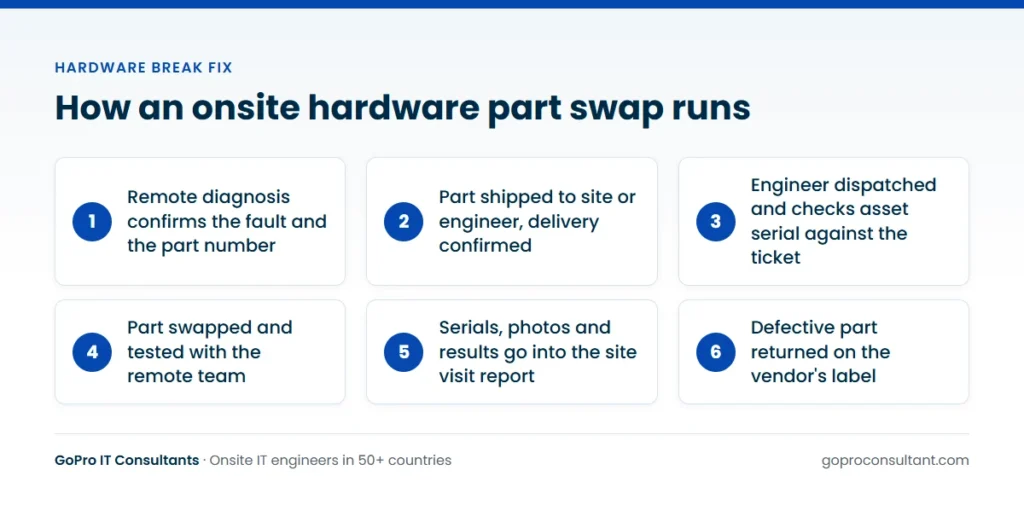
Whether the ticket comes from an OEM warranty desk or a third-party maintenance contract, the shape is similar:
- Your service desk or the vendor diagnoses the fault remotely and decides on the part.
- The part is ordered and shipped to the site or to the engineer.
- The field partner confirms delivery, books access and dispatches an engineer.
- The engineer checks the part matches, swaps it, and tests with your remote team.
- Serials, photos and results go into the site visit report.
- The defective part is packed and returned on the vendor’s label.
It looks simple written down. On the ground, each step has its own ways to go wrong.
Before dispatch: diagnostics and the part decision
The field engineer is only as good as the diagnosis they’re sent with. If the ticket says “server down, replace motherboard” and the real issue is a failed PSU, the engineer can spot it, but can’t fix it without the right part on site. That means a wasted trip and a second ticket.
Pull the logs before you order. For servers, that means the management controller event log and any predictive failure alerts. For laptops and desktops, run the vendor’s built-in diagnostics and note the error code. For storage, confirm which slot and which drive serial is failing, not just “drive 3”. Put all of it in the ticket. An engineer who knows what the remote team already tried won’t waste time repeating it.
If there’s real doubt between two parts, ship both and return the unused one. It’s usually cheaper than a second visit, and most vendors’ processes allow for it.
Parts logistics: getting the right FRU to the right place
In our engagements, parts are shipped by the partner or its vendor, not stocked by the field engineer. That keeps responsibility clear, but it puts the pressure on logistics. Before an engineer travels, someone should confirm:
- The part number matches the asset’s exact model and configuration, not just the product family
- The parcel has been delivered, and where it’s being held (reception, goods-in, a locker)
- Someone on site knows it’s for an engineer visit and won’t send it back or lose it in the post room
- The return label and packaging instructions are in the box or attached to the ticket
- Any customs paperwork is complete for cross-border shipments
Shipping to site is common for scheduled work. For urgent tickets, shipping to the engineer can be quicker, as long as the engineer is told in advance and someone tracks the handover. Whichever you choose, write it in the ticket.
On site: the swap, the serials and the evidence
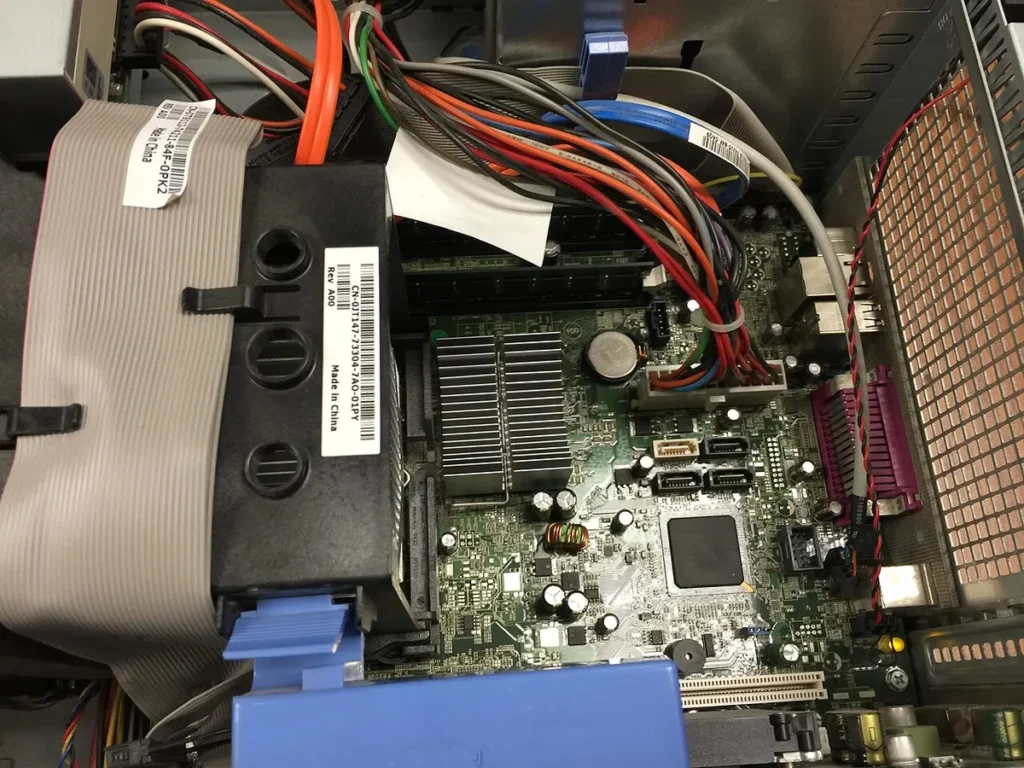
The first thing a good engineer does is check the asset against the ticket. Right site, right rack position, right serial number. Swapping a part in the wrong server is an easy mistake in a room full of identical chassis, and a hard one to undo.
Then they check the replacement before fitting it: part number, revision where it matters, and visible damage. After the swap, they test with your remote team on the phone or via the management console, rather than just watching the lights come on. For data centre work, the steps are similar but access rules are stricter. Our page on data centre smart hands support covers that side.
Every visit gets a site visit report within 24 hours. For a part swap, the useful content is:
- Asset serial and location
- Serial of the part removed and serial of the part fitted
- Photos before and after, including labels
- Test results and who confirmed them remotely
- Anything outstanding, and the return tracking number
The part serials matter more than most people think. TPM vendors and OEMs use them to reconcile stock, approve warranty claims and spot repeat failures on the same asset.
A worked scenario: a system board swap in a branch server
Say your support desk sees a server at a regional office logging memory errors across several DIMMs on the same channel. The pattern points to the system board rather than the memory. A board swap is one of the more involved part swaps, so it shows where the preparation pays off.
Before the visit
Your remote team pulls the management controller log, records the BIOS and firmware levels, and notes the storage controller’s configuration and the boot settings. Where the platform allows, they export the configuration. The board is ordered against the exact model and configuration, shipped to site, and the site contact confirms it’s in the comms room. Because the server has to be shut down, the visit is booked as a scheduled visit in an evening window the client has agreed, not as a same-day call.
On site
The engineer checks the chassis serial against the ticket and photographs the server, the labels and the cabling before touching anything. With your team’s go-ahead the server is shut down cleanly. Wearing an ESD strap, the engineer moves the memory, processors and riser cards across in the order the vendor’s procedure sets out, and inspects the processor sockets on the new board before fitting anything to them.
On many platforms the system serial number has to be written to a replacement board, either by a vendor utility or at first boot. The engineer does this under your team’s direction, because a board left without the right serial can cause warranty and licensing problems later. Your team then checks the BIOS settings and boot order, confirms the storage controller sees the existing array before anything is initialised, and watches the operating system come up.
After the swap
The report carries the chassis serial, the serials of the old and new boards, firmware levels before and after, photos, and the time the server was down. The old board goes into the antistatic bag and box the new one arrived in, with the return label attached. If anything didn’t go to plan, such as a setting that couldn’t be restored, it’s listed as outstanding with the next step agreed.
DOA parts and fixes that don’t hold
Sometimes the new part is dead on arrival. Sometimes it works but the fault comes back, because the original diagnosis was wrong. Either way, the engineer can’t conjure a working part from nowhere.
What they should do is record exactly what they saw: the DOA part’s serial, the symptoms, the tests run, and what they think is needed next. They put the asset back into a safe state, which might mean refitting the original part if it was partly working, and agree that with your remote team before leaving. The return visit is then raised as a new ticket with the new part. If you’ve written this into your break-fix contract with the field partner, there’s no debate about it afterwards.
Flag DOA parts to the vendor as DOA, not as normal returns. Many vendors track them separately, and you want the record if the same part number keeps failing.
Common causes of a second visit, and how to avoid them
DOA parts are only one reason a part swap turns into two visits. Most of the others are preventable from the desk.
| Cause | What happens on site | How to prevent it |
|---|---|---|
| Part ordered by product family, not exact configuration | Wrong connector, bracket, capacity or revision | Order against the asset serial and its configuration record |
| Parcel delivered but not traceable | Engineer arrives and nobody can find the part | Confirm the holding location and a named person before dispatch |
| Downtime not agreed with the client | Engineer can’t shut the device down | Book a scheduled visit inside an agreed window |
| No remote team available to test | Swap done but nobody can confirm the fix | Name a remote contact and a direct number in the ticket |
| Rails, screws or cables missing | Part can’t be mounted or connected | Check what ships with the part and what has to be reused |
| Access not booked | Engineer turned away at reception or the cage | Register the engineer with the site before they travel |
A useful habit is to review every second visit at the end of the month and tag it with one of these causes. The same two or three usually come up, and they point at a process to fix rather than an engineer to blame.
Returns and data-bearing parts
The defective part normally goes back to the vendor, often within a set number of days, or you get billed for it. The engineer packs it in the replacement’s packaging, attaches the return label, and either leaves it for collection or drops it at a carrier point, depending on what the ticket says.
Drives are the exception to watch. Many end clients won’t let a failed drive leave site because of the data on it, and some service contracts include a drive retention option for exactly this reason. Agree up front whether the drive goes back to the vendor, stays with the client, or goes for destruction. If it’s being destroyed, use a proper route such as our IT asset disposition service, and record the serial in the report.
Cross-border parts and swaps in several countries
Part swaps get harder when the part and the site are in different countries. Shipments from a central depot can sit in customs if the paperwork is incomplete, so agree who acts as importer of record, and make sure the commercial invoice describes the part accurately. Allow for the extra days in the response tier you promise. A 4-hour engineer response doesn’t help if the part is still at the border.
Returns need the same thought in reverse. A return label printed for one country may not work for a carrier in another, and some sites, data centres especially, only release outbound parcels against a booked collection. Write the return method into the ticket for each country, and include packing instructions the engineer can follow without a translation. Local public holidays affect couriers as well as engineers, so check both when you schedule. Our global coverage page shows where we have engineers, which helps you plan where parts need to be stocked.
What a properly closed part swap looks like
A ticket isn’t finished when the new part lights up. Agree acceptance criteria so the desk, the engineer and the vendor all close the job on the same terms. A sensible set: your remote team has confirmed the component is healthy in the management console, no new alerts appeared before the engineer left, the site contact has signed off or been told, the report is in with both serials, and the defective part has a return tracking number. Only then should the ticket close.
If the asset is due for retirement rather than repair, say so in the report. A device that keeps needing parts may be cheaper to replace, and our guide to IT asset disposition covers what happens to it next.
A short glossary of part-swap terms
- FRU (field replaceable unit): a part designed to be swapped on site by an engineer, such as a board, PSU or drive.
- CRU (customer replaceable unit): a part simple enough for the customer to swap, though many still send an engineer.
- DOA (dead on arrival): a replacement part that’s faulty out of the box.
- RMA (return merchandise authorisation): the vendor’s reference for returning a part, and usually the key to getting a credit.
- Advance replacement: the new part ships before the old one is returned, which is the norm for onsite break-fix.
- Drive retention: a contract option that lets the client keep failed drives instead of returning them.
- Forward stocking location: a local store of spares held close to the sites they serve, to shorten delivery.
TPM and OEM tickets: what changes
From the engineer’s point of view, the swap itself is the same. What changes is who owns the process around it.
| Area | OEM warranty ticket | TPM ticket |
|---|---|---|
| Who diagnoses | OEM support desk | TPM vendor’s support team |
| Parts source | OEM depot, usually new or certified | TPM stock, may be new or refurbished |
| Report format | Often the OEM’s own fields | The TPM’s template |
| Returns | OEM label and deadline | TPM’s own returns process |
| Brand on site | Often the OEM or its partner | Usually the TPM vendor |
With TPM parts, it’s worth the engineer checking firmware levels after the swap, since a refurbished part may carry older firmware than the rest of the system. Your remote team decides whether to update it. The engineer flags it. In a data centre the same swap sits inside a wider service, which we look at in how onsite support works in third-party maintenance.
For TPM vendors in particular, the field engineer usually works under your brand. That’s the norm for break fix IT support delivered through a partner, and our engineers can wear your badge and use your report template. You can see how we set this up on our break-fix services page, and the dispatch side is on our field engineer dispatch page. Get the steps above right and hardware break fix becomes routine work rather than a string of repeat visits.
Frequently asked questions
Does the field engineer bring the replacement part?
Usually not. Parts are shipped by the partner or its vendor to the site or the engineer, and the engineer confirms the part matches before fitting it.
What happens if the replacement part is faulty?
The engineer records the faulty part's serial, symptoms and tests, leaves the asset in a safe state and the return visit is raised as a new ticket.
Can the engineer take a failed drive off site?
Only if you and the end client agree it. Many clients keep failed drives or send them for destruction, so the ticket should say which route applies.
Can a field engineer update firmware after the swap?
They can if your remote team asks and the scope allows it. Otherwise they note the firmware level in the report so your team can decide.
Need an engineer for a part swap?
We dispatch engineers for TPM and OEM part swaps and send a site visit report within 24 hours with photos and serials.
Log a ticket