

Most smart hands data center visits that go wrong were lost before the engineer left home. The access list didn’t have their name on it, the replacement PSU was sitting in a goods-in cage nobody could open, or the change window closed while the engineer waited for a callback. None of that is about skill. It’s about what was sent, and what wasn’t, before the visit.
Below is the checklist we’d want any partner to run through before booking data centre work. Use it as a final pass on the ticket, or copy the condensed version at the end into your ticketing system as a template.
Site access and security
Data centres are strict about who walks through the door, and rightly so. Sort access first, because it’s the one item the engineer can’t fix on arrival.
- Engineer added to the site access list under the exact name on their photo ID.
- Access or work order reference from the facility, written into the ticket.
- Which entrance to use, and whether a security escort is needed to reach the hall.
- Cage, suite and cabinet keys or codes: who holds them, and how the engineer gets them.
- Any site induction the engineer must complete first, and how long it takes.
- Rules on photography. Some facilities restrict photos, which matters if you need photo evidence back.
Check how much notice the facility wants for adding a visitor. If you book an urgent visit, make the access request at the same time you raise the ticket, not after the engineer is confirmed.
Device location and identification
Large halls look the same from aisle to aisle. The engineer needs enough detail to walk straight to the right device and prove it’s the right one before touching it.
- Hall or suite, row, cabinet ID and U position.
- Hostname, asset tag and serial number of the device.
- A rack elevation, or a recent photo of the front and rear of the cabinet.
- For cabling jobs, the patch panel and port numbers at both ends.
- For drive or module swaps, the bay or slot number and the LED state you expect to see.
If your records might be out of date, say so. An engineer who knows the elevation could be wrong will check labels and serials more carefully, and call before acting on a mismatch.
Parts, deliveries and returns
Parts are where most wasted visits come from. Parts are shipped by you or your hardware vendor, so the engineer depends entirely on what you’ve arranged. Before you confirm a time, check:
- The part number matches the device, including revision or firmware family where it matters.
- The delivery has a tracking reference and shows as delivered, not just dispatched.
- You know where it landed: loading bay, goods-in, a storage locker or your cage.
- The facility knows the engineer is collecting it, and under which reference.
- Return instructions for the failed part: packaging, label, courier booking and collection point.
Many facilities hold deliveries against a named account or ticket, and won’t release a box without it. Put that reference in the ticket in plain sight. If the part isn’t confirmed on site, it’s usually better to move the visit than to send someone to wait for a courier.
Change window, people and sign-off
A lot of smart hands work happens inside a change window agreed with the end customer. The engineer needs to know the window and who controls it.
- Change reference and the approved start and finish times, with the time zone stated.
- A named remote contact, with a direct phone number, available for the whole window.
- Who can approve extra work or a change of plan if the fault isn’t what was expected.
- A backout step if the change has to be reversed before the window closes.
State the time zone every time. Cross-border tickets are where a “10:00” visit turns into an engineer arriving an hour early or an hour late. For planned work, book a scheduled visit on an agreed date and time, including nights or weekends if that’s when the window falls. For faults, pick the tier that matches the impact: 4-hour response in major cities, same business day for faults logged before the cut-off, or next business day.
Tools, consumables and site rules
Engineers bring a standard toolkit. What they won’t have is anything specific to your kit or the job, so list it.
- Patch leads by type, length and colour, if your cabinet has a colour scheme.
- Rail kits, cage nuts and screws for new installs, and whether they’re in the box.
- Console cables or adapters if the engineer needs to connect locally.
- Labels and your labelling convention, so new cables match the existing ones.
- Site rules on lifting, packaging waste, and what can be left in the hall.
Heavy installs deserve a line of their own. If a chassis needs two people or a lift, say so when you book, because one engineer can’t safely rack a large storage shelf at the top of a cabinet. Our guide to planning an IT rollout covers the same thinking for multi-site installs.
What you should get back after the visit
Decide up front what evidence you need, so the engineer collects it while they’re in front of the rack. Going back for a missing serial number costs a second visit. With GoPro IT Consultants, every visit comes with a site visit report within 24 hours. Here’s what’s worth asking for:
| Evidence | Why it matters |
|---|---|
| Before and after photos, front and rear | Shows the state of the rack and proves the work was done where you asked |
| Serial numbers in and out | Needed for vendor returns, warranty claims and your asset register |
| LED and link status | Gives the remote team a quick physical confirmation |
| Work done and time on site | Matches the billing to the ticket |
| Anything outstanding | Tells you whether a part or a second visit is needed |
If the job needs a part or another visit, the engineer records what was found and what’s needed, and the return visit goes in as a new ticket. If you resell the work, the engineer can attend under your brand and use your report template.
When to run each check
A checklist run once, at the moment you raise the ticket, catches the obvious gaps. It misses the things that change between booking and arrival: a courier that slips a day, a change window moved by the customer, a remote contact who goes on leave. Split the checks across the timeline instead.
When the ticket is raised
Submit the access request, confirm the device location and serial, order the part and agree the change window. These have the longest lead times, so they go first. If the facility needs several days’ notice for a visitor, that notice period sets the earliest date you can book, whatever response tier you’d like.
The working day before
Check that the access request shows as approved, not just submitted. Check the tracking shows the part delivered and note who signed for it. Confirm the remote contact is still available for the window and has the engineer’s name. This is the last point where moving the visit costs nothing.
A couple of hours before
For urgent and out-of-hours work, recheck that the fault still exists and the window still stands. Faults sometimes clear on their own, and a customer change board sometimes cancels at short notice. A two-minute call here avoids an aborted visit.
On arrival
The engineer confirms they’re through security, have the part in hand and have spoken to the remote contact before touching anything. That call is the final gate. If any item fails at this point, the engineer stops and reports rather than improvising.
A worked example: a weekend PSU swap in another country
Say one of the two power supplies in a customer’s storage controller has failed at a colocation site abroad. The array is running on one PSU, so it isn’t an outage, but the customer wants it fixed in a Saturday morning window. Here’s how the checklist plays out.
Access. You raise the visitor request on Wednesday under the customer’s account, using the engineer’s name exactly as it appears on their passport. The facility confirms on Thursday. You put the approval reference in the ticket.
Location. The customer’s rack elevation is two years old. You say so in the ticket, and ask the engineer to match the controller serial to the label before touching anything.
Parts. The vendor ships the PSU on Wednesday. On Friday the tracking shows it held at customs. This is the decision point. You can’t confirm the part will be on site, so you move the visit to the next agreed window rather than sending the engineer to wait. Had the part been confirmed in goods-in with a release reference, the visit would have gone ahead.
Window and contact. The new window is stated in local time and UK time, and the customer’s storage administrator confirms they’ll be on the phone to watch the controller status.
Evidence. The facility allows photos inside the customer’s cage only, so the ticket asks for photos of the controller and PSU bays, both PSU serials, and the status LEDs after the swap, plus the remote contact’s confirmation that both supplies are reporting.
The swap itself takes minutes. Almost all the work was in the checks, and the one that failed was caught before anyone travelled. If the failed unit needs to go somewhere other than back to the vendor, the same thinking applies to returns. Kit containing data should go through certified IT asset disposition rather than a general courier.
Go or postpone: deciding when a check fails
Not every gap should stop a visit. Some can be closed on the day, others make a wasted trip almost certain. A simple rule set saves your team arguing about it at 7am.
| Check that failed | Usual decision | Reason |
|---|---|---|
| Access not approved | Postpone | The engineer can’t get past security without it |
| Part not confirmed on site | Postpone, unless the job is diagnosis only | A swap without the part is an aborted visit |
| Remote contact unavailable | Postpone, or name a stand-in | Nobody can confirm the result or approve a change |
| Serial number unknown | Go, with a stop point if the label doesn’t match | The engineer can read it on site |
| Rack elevation out of date | Go, with extra checks before touching kit | Labels and serials can confirm the device |
| Photos not allowed | Go, with other agreed evidence | Serials, LED status and remote confirmation still work |
Adjust the rules to the impact of the fault. If a service is down, a visit with a known gap may still be the right call, as long as everyone knows the gap is there.
Extra checks for multi-site and cross-border visits
If you look after kit in facilities run by different operators, or in several countries, each site is its own access process, its own delivery rules and its own idea of what a visitor may do. Keep a one-page site profile for each facility: the access route and notice period, whether an escort or induction is needed, how goods-in holds deliveries, the photo policy and the local out-of-hours arrangements. The checklist then becomes a comparison against the profile rather than a fresh investigation every time.
Across borders, add three more checks. Allow time for parts to clear customs before you book, and get the vendor to state the import arrangements on the shipment. Check local public holidays for the facility, the courier and the remote contact. And confirm the language for the remote call if your contact and the engineer don’t share one. Where the job continues outside the data centre, for example a follow-up at the customer’s office, book it as a separate field engineer visit with its own access and contact details.
Heavier installs deserve their own planning beyond this checklist. Our server rack installation guide covers weight, rails and power for new builds.
The smart hands data center checklist, condensed
Here’s the short version to paste into your ticket template. If every line has an answer, the visit is ready to book.
- Engineer on the access list, access reference in the ticket.
- Hall, row, cabinet, U position, hostname and serial number.
- Part confirmed delivered, location and release reference known.
- Change window, time zone and remote contact confirmed.
- Task written as steps, with what not to touch.
- Special tools, cables and consumables listed.
- Evidence required in the report agreed.
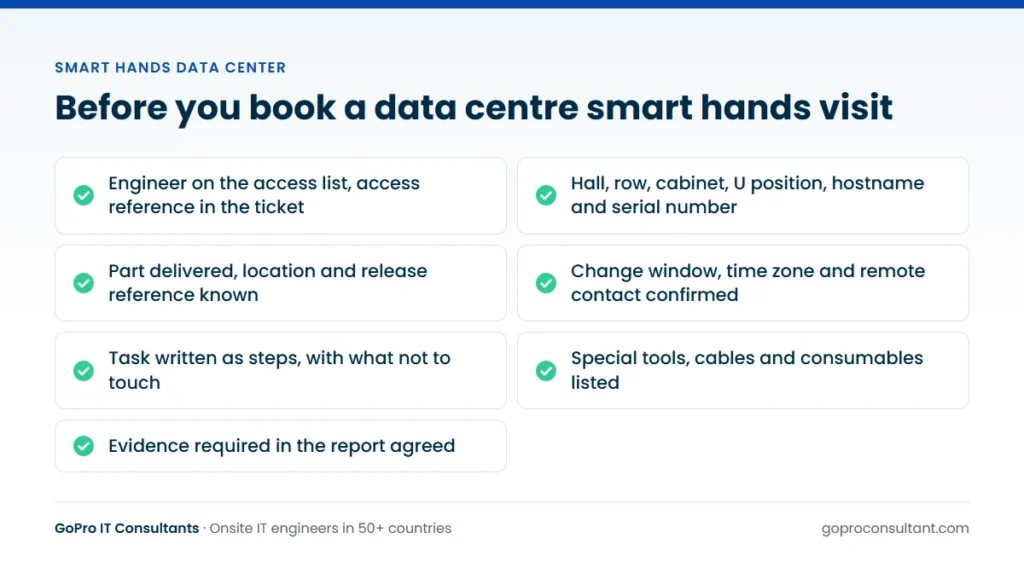
Item 5 is a topic on its own. Our post on scoping a smart hands support ticket goes through writing the task as steps and drawing the scope boundary. For the services themselves, see our data centre support and smart hands page, or the countries we cover if your sites are spread across borders. This is how we run data center smart hands support for partners, and it works the same whether the site is in Germany, the Gulf or Australia.
Frequently asked questions
How much notice does a data centre visit need?
It depends on the facility's access rules and the response tier you book. Raise the access request at the same time as the ticket so the engineer's name is on the list when they arrive.
What if the facility won't release the delivered part?
Facilities usually hold deliveries against a named account or reference. Put that reference in the ticket and tell the facility who is collecting, or the engineer may not be able to get the box.
Can the engineer take photos inside the data centre?
Only where the facility allows it. If photos are restricted, agree other evidence in advance, such as serial numbers, LED status and confirmation from your remote contact.
Who ships replacement parts for a smart hands visit?
Parts are shipped by you or your hardware vendor. The engineer collects them on site, fits them and records the serial numbers of the parts going in and coming out.
Ready to book a data centre visit?
Try us with one pilot ticket, no minimum commitment. Every visit gets a report with photos and serial numbers within 24 hours.
Book a pilot visit