

A network switch installation on site is mostly preparation and discipline. The configuration is done before the visit, the onsite engineer racks the switch, gets console access, moves cables against a port map, and tests every service with the remote network team before anyone signs off. The hardware swap itself is often the quickest part of the job.
This guide sets out what the engineer actually does when installing a new switch or replacing a failed one, and what you need to give them so the work fits inside the change window. It applies equally to access switches in a branch office, a stack in a comms room or a top-of-rack swap in a data centre.
What a network switch installation involves on site
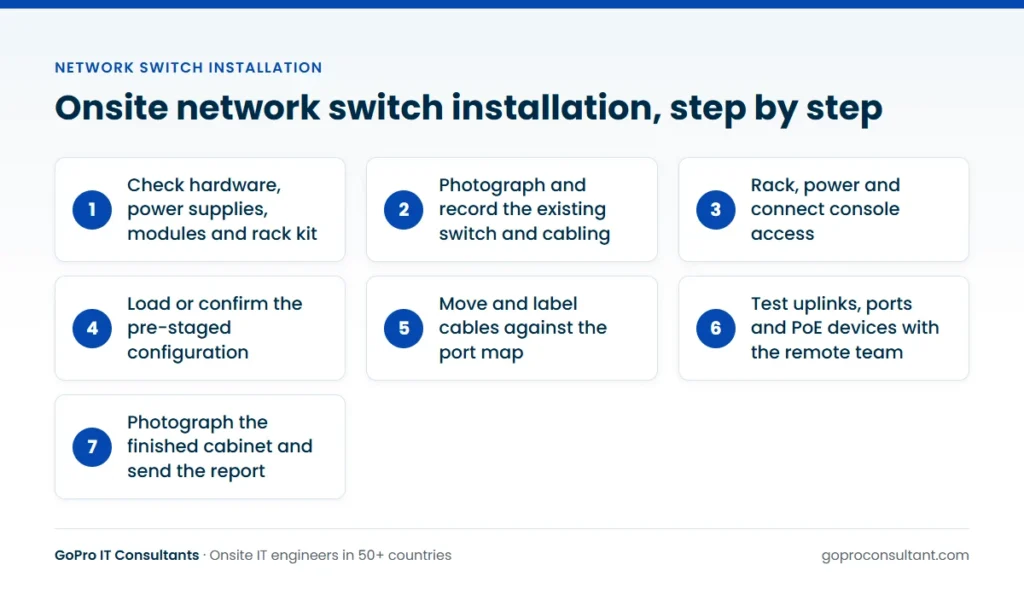
Whether it’s a new install, a like-for-like replacement or an upgrade to a bigger model, the onsite work follows the same shape:
- Confirm the right hardware has arrived, with the right power supplies, modules and rack kit
- Record the existing state: photos, port usage, cable labels and LED status
- Rack and power the new switch, with console access ready
- Load or confirm the pre-staged configuration
- Move cables from old to new against the port map, labelling as you go
- Test with the remote team, then tidy, photograph and report
The engineer is the hands. Your network engineer, or the end client’s, is the brain on the other end of the console session or the phone. That split is normal, and it’s how most ethernet switch installation work is done when the network team is in another city or country. If you’re weighing this against using a colocation provider’s own staff, our article on smart hands vs remote hands explains the difference.
Before the visit: pre-staged config and a port map
The single biggest factor in a short, clean switch installation is a configuration that’s ready before the engineer arrives. Ideally the switch is staged centrally, with firmware upgraded and config loaded, then shipped to site labelled with its hostname. Cloud-managed switches can be claimed to the dashboard and pick up their config on first connection. Either way, the engineer shouldn’t be building VLANs from scratch on site.
The second essential is a port map. For a replacement, it maps every cable on the old switch to its port on the new one. For a new install, it maps outlets and devices to ports. A simple table is enough:
| Old port | New port | Patch panel / outlet | Device or use | VLAN |
|---|---|---|---|---|
| Gi1/0/1 | 1/1/1 | PP1-01 | Reception desk | Data |
| Gi1/0/12 | 1/1/12 | PP1-12 | AP-GF-03 | Wi-Fi mgmt |
| Gi1/0/24 | 1/1/24 | PP1-24 | Printer, first floor | |
| Te1/1/1 | 1/1/49 | Fibre to core | Uplink | Trunk |
Without a port map, the engineer has to trace and record every cable on the day, which turns a short swap into a long one. With a good one, they can move cables quickly and you know exactly what changed.
Console access and the remote network team
Console access is the safety net. The engineer should bring a console cable (RJ45, USB-C or micro-USB, depending on the model), a USB-to-serial adapter, and a laptop with a terminal program. If something goes wrong with the uplink or the config, console access lets your team recover the switch without a second visit.
Agree the method of remote access before the day. Common options are a screen-sharing session on the engineer’s laptop, a temporary out-of-band connection, or the engineer reading output back over the phone. Confirm who is on call, their number, and the change window. A switch replacement that starts on time but waits an hour for the remote engineer to join is a cost nobody planned for.
Who does what during the change
Write the split into the ticket. When it’s left unsaid, the engineer either waits for instructions that never come or makes decisions that weren’t theirs to make.
| Role | Owns |
|---|---|
| You (MSP or integrator) | The change record, port map, window and go or no-go call |
| Remote network engineer | Config, firmware, remote testing and the rollback decision |
| End client site contact | Access, keys, alarm codes and confirming users are offline |
| Vendor or distributor | Delivering the switch, optics and any replacement under RMA |
| Onsite engineer | Racking, console, cable moves, labelling, photos and report |
Physical install: rack, power and airflow
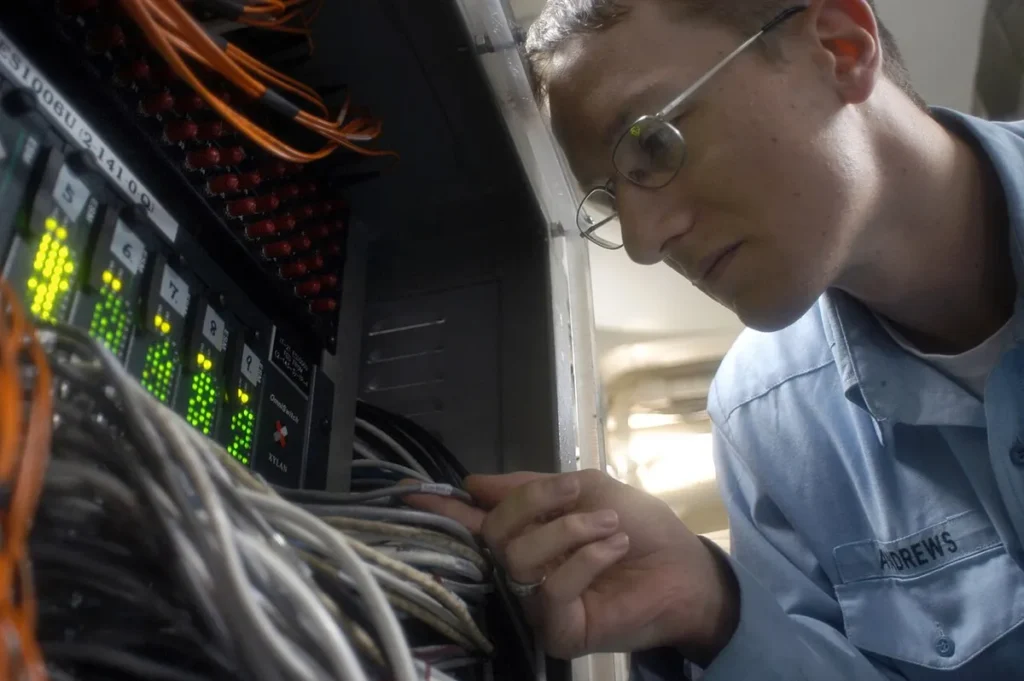
Physically, the switch should go in with the right rack ears or rails, at the position in the rack elevation, with clearance for airflow. Check the airflow direction matches the rack: front-to-back or back-to-front fans need to suit the hot and cold aisles, especially in a data centre.
Connect both power supplies if the switch has two, ideally to separate feeds or PDUs. Fit any SFP modules and check they’re the type the config expects. For stacked switches, connect the stacking cables in the order your design specifies before powering up, then confirm the stack forms with the right member numbers.
For the old switch, label it, record its serial number and keep it powered off but in place until testing is complete. That gives you a quick rollback if the new one misbehaves. If the cabinet itself is cramped, badly dressed or short of power, note it in the report rather than trying to rebuild it inside the change window. Our network cabinet setup guide covers how to plan that as a separate job.
Moving cables: port mapping and labelling
Cable moves are where mistakes creep in, so the method matters. A good engineer moves one cable at a time, or one small group, checks it against the port map, and labels both ends if they aren’t labelled already. Uplinks usually move last, once the access ports are in place and the new switch is confirmed reachable.
Labelling should match the patch panel scheme and the port descriptions in the switch config. If the old cabling was unlabelled, this is the cheapest moment to fix it. Tie cables neatly with hook-and-loop ties rather than plastic zip ties, and leave patch leads at sensible lengths so the cabinet stays workable. A tidy cabinet isn’t vanity. It’s what makes the next fault quick to diagnose.
Testing with the remote team
Before the engineer leaves, the remote team should confirm the switch is healthy and every service works. A sensible test sequence:
- Confirm the switch is reachable on its management address and running the expected firmware
- Check uplinks are up at the right speed, and trunks carry the right VLANs
- Check port status against the port map, and investigate anything unexpectedly down
- Confirm PoE devices (access points, phones, cameras) are powered and online
- Test a sample of user ports for DHCP, internet and internal services
- Save the running config and back it up
Only once that’s done should the old switch be disconnected and removed.
Agree the rollback point in advance too. If testing fails and the remote team can’t fix it within an agreed time, the engineer moves the cables back to the old switch using the same port map, and the new one is investigated later. Deciding that before the window opens stops a planned change turning into an unplanned outage, and it means the engineer isn’t left choosing on behalf of your client at two in the morning.
A typical overnight stack replacement
Say you’re replacing an ageing two-member access stack in a branch office with two new PoE switches. Around a hundred user ports, a dozen access points, desk phones and a fibre uplink to the core. The window runs from 10 pm to 2 am local time.
The week before
Your network team stages both switches centrally: firmware upgraded, stack configured, port descriptions set to match the port map, then ships them to site labelled with hostname and stack member number. You confirm delivery and check the box contents with the site: two switches, stacking cable, power cords for both supplies, rack kit and the right SFPs for the uplink. The engineer receives the port map, cabinet photos, site contact and the remote engineer’s number.
In the window
The engineer arrives, photographs the cabinet and calls the remote engineer to open the change. If there’s free U, the new stack goes in below the old one and is powered with the stacking cable connected; if not, the old stack has to come out first, which takes longer and makes rollback slower, so you’ll want to know that in advance. The remote engineer confirms the stack has formed over console. Then the cable moves start, one block of ports at a time, access points and phones checked as they come up. The uplink moves last. Once the remote engineer confirms everything is green, the old stack is powered off and left in place until the test plan is complete, then removed.
The morning after
The report lands with before and after photos, both serial numbers, the final port map and a note of any port that didn’t come up and why. A user or two may still report a dead desk port at 9 am, usually a cable that was unpatched before the change. With good photos, your service desk can check that remotely. Because access points are part of most switch changes now, our post on access point installation is worth a look if the APs are being replaced at the same time.
Common switch installation mistakes
- Wrong optics. The uplink SFP doesn’t match the fibre type or the core switch, so the new switch is isolated. Check optic type and fibre type before shipping.
- Missing power cords. Some switches ship without cords, or with the wrong country’s plug. Confirm before the window.
- Not enough PoE budget. The new model has fewer PoE watts than the old one, and the last few phones or access points don’t power up.
- Removing the old switch too early, which turns a quick rollback into a rebuild.
- Moving all cables at once. When something doesn’t work, nobody knows which move caused it.
- No console cable on site. The one recovery path that doesn’t depend on the network isn’t available.
- Config not saved. Everything works until the next power cut, then the switch boots its old config.
Questions to ask before you book an onsite engineer
Whoever supplies the engineer, these questions tell you quickly whether the job will go to plan:
- Will the engineer bring a laptop, terminal software and console cables for this model, including a USB-to-serial adapter?
- Have they worked with this vendor’s hardware and stacking before, and can they read CLI output back accurately?
- Can the visit be booked at the exact window, including nights or weekends?
- What happens if the engineer can’t attend on the night?
- How long will they wait if the remote team is late or testing overruns?
- Will they attend under our brand and use our report template?
- What does the report include, and when does it arrive?
Switch work in other countries
Switch swaps abroad fail on logistics far more often than on skill. Power cords and plug types vary by country, so ship the right ones or confirm the site has them. Staged switches shipped across borders can be held in customs, so track the delivery to the building and don’t confirm the engineer until it’s there. Replacement units under RMA usually come from the vendor’s regional depot rather than your stock, which affects lead time.
Time zones shape the window. A 10 pm change at a site in Dubai or Sydney may land in the middle of your remote engineer’s working day, or the middle of their night. Pick the window that suits both, and name a backup contact. Many buildings also have their own rules for out-of-hours access and contractor sign-in, so get those from the site contact early. And confirm the working language: the engineer and your remote team need to talk through cable moves clearly, port by port. Our global coverage spans engineers in 50+ countries.
Photos and the site visit report
Photos are cheap and save hours later. Take them before work starts, after the switch is racked, after cables are moved, and of the finished cabinet front and back. Photograph the serial number labels of both switches.
Every visit from GoPro IT Consultants comes with a site visit report within 24 hours, including photos, serial numbers, work done and anything outstanding. If the old switch needs returning to a vendor or disposing of through IT asset disposition, the report records that too. If an engineer can’t attend, a backup is assigned and you’re told straight away. Engineers can work under your brand and badge, use your report template, and never discuss commercial terms with your client. If the work uncovers a fault that needs a part or a second visit, it’s recorded and raised as a new ticket.
For a single switch swap, field engineer dispatch or break/fix support is the usual route. For multi-site refreshes, combine it with managed network services. When a switch fails unexpectedly rather than being planned, our guide to network break/fix covers how to handle the call.
Frequently asked questions
Can the work be done in an overnight change window?
Yes. Visits can be scheduled on an agreed date and time, including nights and weekends, so the switch swap can happen when users are offline.
What if the replacement switch is faulty on arrival?
The engineer records the fault with photos, keeps the old switch in service if possible and reports straight away. Replacement parts come from you or your vendor, and the return visit is raised as a new ticket.
Does the engineer need to know our switch vendor's CLI?
It helps, and the brief should name the vendor and model. In most jobs the remote network team drives the configuration, and the engineer handles console access, cabling and physical checks.
Can the engineer take away the old switch?
If you arrange it, yes. The old unit can be returned to your vendor or sent for disposal through certified recycling partners, with its serial number recorded in the report.
Need a switch installed or swapped on site?
Send the port map and change window. Our engineers work with your remote team and report within 24 hours.
Book an engineer