

A good server rack installation is mostly decided before anyone lifts a server. You need a plan for rack units, weight, power, airflow and cabling, and an engineer on site who follows it. Get those right and the rack stays tidy, cool and easy to work on for years. Get them wrong and every later visit costs more time.
This guide walks through a proper server rack setup in the order it should happen, from the paper plan to the labels on the last patch lead. It’s written for the person who has to brief the job and sign it off, whether the rack sits in a colocation hall or a comms room at the back of an office.
Plan the rack before anyone travels
Start with a rack elevation: a simple drawing of every U, top to bottom, showing what goes where. It doesn’t need special software. A spreadsheet with one row per rack unit does the job, as long as it shows the device, its height in U, its depth, and its power draw.
A few rules of thumb make the elevation sensible:
- Heavy kit low. UPS units, storage arrays and large servers go at the bottom so the rack’s centre of gravity stays down.
- Network gear where the cables arrive. If cabling comes in from overhead tray, switches and patch panels often sit near the top. If it comes up through a raised floor, lower can make sense.
- Leave spare U. A rack filled to the last unit on day one has nowhere to go when the next server arrives.
- Check depth, not just height. Some servers and their rails need a deep rack, and a short rack can stop the rear door closing.
Send the elevation with the ticket. An engineer who arrives with a drawing works faster and makes fewer judgement calls you’ll later disagree with.
Counting rack units properly
One rack unit (1U) is 1.75 inches, or 44.45 mm, of vertical space in a standard 19-inch rack. A 42U rack sounds roomy until you count everything that isn’t a server. Cable managers, patch panels, a KVM or console tray, a shelf for an odd-shaped appliance and any horizontal PDUs all take U. Vertical 0U PDUs don’t, but they need clear space down the rear sides, which narrower racks may not have.
Put every one of those items in the elevation. Mark spare U as reserved rather than leaving it blank, so nobody fills it with a temporary box that becomes permanent. And note depth beside each position: a long server next to a vertically mounted PDU can foul it, even when the U count works.
Check weight, floor and physical access
A loaded rack is heavy, and the floor has to carry it. In a data centre this is usually covered by the facility’s own rules, so check the floor loading allowed for your cage or suite. In an office comms room, nobody may have asked the question before. If the rack is going on a raised floor or an upper storey, get the building’s facilities team to confirm it’s fine.
Then think about getting the kit in. Lifts, door widths, loading bay hours and stairs all affect how many people you need and when they can work. A common problem is a rack delivered fully assembled that won’t fit through the comms room door. Ask the site for door and lift dimensions before the delivery is booked.
Once the rack is in position, level it, fit stabiliser feet or bolt it down if the site requires it, and join it to neighbouring racks with baying kits if that’s the design. Do this before any equipment goes in. Never load a free-standing rack from the top down, and never pull out more than one server on its rails at a time unless the rack is secured.
Power and PDUs
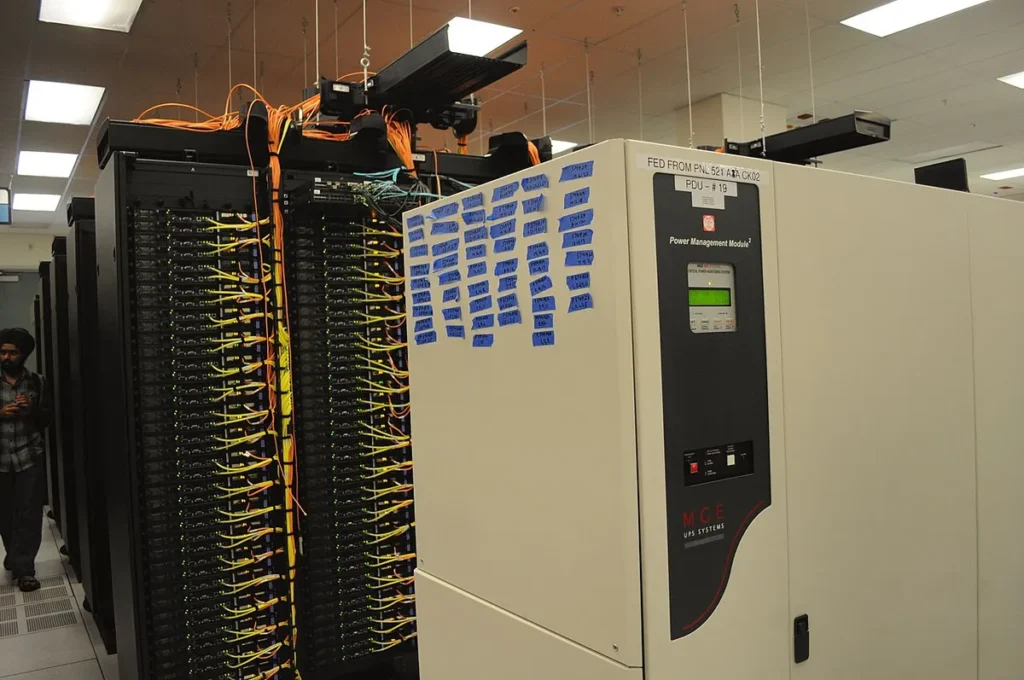
Add up the expected draw for everything in the rack and compare it with what the feeds can supply. Use real figures from the vendor’s power calculator where you can, not the nameplate maximum, but leave headroom. Then decide how redundancy works. The usual pattern is two PDUs on separate feeds (often called A and B), with each dual-PSU device connected to both.
For the engineer on site, the useful details are:
- Which PDU is A and which is B, and which side of the rack each sits on.
- The connector types on the PDUs and the power leads you’re supplying. Mismatched leads are one of the most common reasons an install stalls.
- Whether the PDUs are metered or switched, and whether they need a network connection and IP address.
- Colour-coded leads for each feed, if your standard uses them. They make an A/B mistake obvious at a glance.
Ask the engineer to check that every device is on both feeds and record the PDU outlet numbers in the visit report. That record pays for itself the first time someone needs to power-cycle a single server remotely.
Working out the power budget
The sum is simple but often skipped. With A/B redundancy, each feed has to carry the whole rack on its own if the other one fails, so compare the total against a single feed, not both added together. If the total sits close to a feed’s limit, move a device to another rack now rather than finding out when a breaker trips during a failover test. In a colocation facility, the power you’re allowed per rack is set in your agreement with the provider, so check that figure before adding kit.
Airflow and cooling
Most servers and switches pull cold air in at the front and push hot air out of the back. The rack layout should respect that. Mount equipment facing the cold aisle, fit blanking panels in every empty U, and seal gaps around the sides so hot exhaust can’t loop back round to the intakes.
Watch for network switches. Many are designed to be mounted with ports at the rear, which can mean their airflow runs the opposite way from the servers. Check the model’s airflow direction (some have options for either) before deciding which way it faces. In a small comms room without proper aisles, make sure the room itself has cooling that can handle the heat the rack will give off.
Who does what on a rack build
A rack install usually involves more parties than the person raising the ticket expects. Agreeing who owns each piece stops the engineer standing in a data hall waiting for a decision nobody thought was theirs.
| Party | Usually responsible for |
|---|---|
| You (MSP, integrator or TPM vendor) | Elevation, patch schedule, the ticket and running the day |
| End client | Approving the design, site access and a named contact |
| Hardware vendor or reseller | Delivering servers, rails, leads and PDUs to site |
| Facility or building team | Floor loading, power feeds, access rules and goods-in |
| Network or systems team | Configuration and remote checks once kit is powered |
| Field engineer | Physical install, cabling, labelling, photos and report |
Put a name and phone number against each line in the ticket. If the engineer is attending for your client under your brand, say so, and say how you want them to introduce themselves on site. Our white-label IT services work that way as standard.
Server rack installation on site: rails and mounting
With the rack secured and powered, the engineer works up from the bottom. For each device the sequence is: fit the rails to the elevation, mount the device, check it slides and locks correctly, then fit the cable management arm if there is one. Vendor rail kits differ, so the engineer should have the vendor’s own rail instructions for each model.
Rails cause more delays than you’d expect, usually because the kit doesn’t suit the rack’s hole type or depth. We cover that in detail in our guide to installing server rack rails. The short version: confirm square-hole or round-hole, confirm rack depth, and confirm the rail kits are actually in the delivery before the engineer is booked.
Two people should lift and mount anything heavy. If your ticket allows one engineer for a job with several large servers, expect it to take longer or need a second visit.
Cabling and labelling
Cabling is where racks go from neat to unmanageable. Agree the approach before the visit: which ports connect to which, what lead lengths to use, and how power and data are separated. Keep power on one side of the rack and data on the other where you can. Use horizontal cable managers between switches and patch panels, and vertical managers down the sides.
Labelling should be done as the work happens, not at the end. Label both ends of every cable, label every device on the front and rear, and match the labels to your documentation. A patch schedule (port A to port B, cable ID, length) is the single most useful thing to get back from an install. If the rack connects to a comms room cabinet elsewhere, our post on network cabinet setup covers that side.
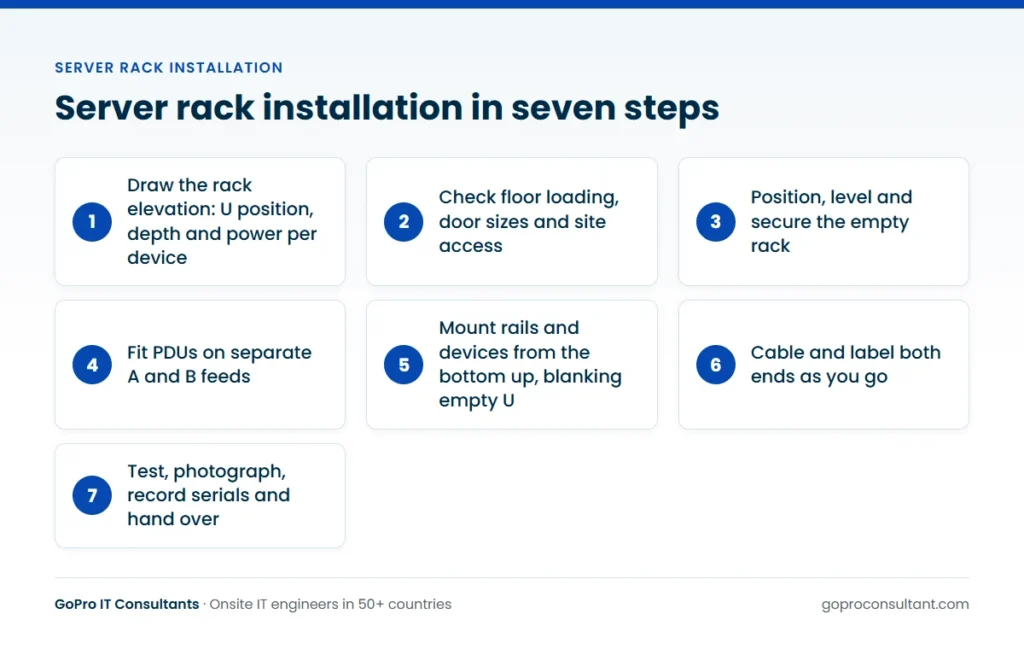
A typical rack build, step by step
Say you’re moving an end client into a new 42U rack in a colocation cage: a handful of 1U and 2U servers, a storage array, two top-of-rack switches, a pair of PDUs and a patch panel back to the client’s cross-connect. A well-run job usually goes like this.
- The week before. You send the elevation, patch schedule and power plan. The engineer’s coordinator reads them and asks about anything unclear, such as a server listed without its depth.
- Delivery check. The facility confirms the pallets are in goods-in, and someone checks the packing lists against the elevation, including rails, PDU leads and optics, before the slot is confirmed.
- Arrival. The engineer signs in under the facility’s process, collects the kit and unpacks outside the data hall if the site requires it.
- Empty rack. They check it’s level, secured and baying where planned, fit the PDUs and confirm with the facility that both feeds are live.
- Heavy kit first. The storage array and largest servers go in at the bottom with two people lifting, then the lighter servers, then switches and the patch panel.
- Power and data. Each device goes onto both PDUs, then data cables are run to the patch schedule and labelled at both ends as each one goes in.
- Remote checks. Your systems team confirms management interfaces respond and links are up. The engineer fixes anything flagged while still on site.
- Close-out. Blanking panels in, packaging out, front and rear photos taken, serials recorded and the report sent.
The real decisions sit at steps 2 and 7. If something is missing at step 2, it’s usually better to move the visit than to pay for an engineer to install half a rack. At step 7, agree beforehand how long the engineer waits for remote checks, so a slow reply from a busy team doesn’t quietly become an extra day.
Common mistakes and how to avoid them
- Loading a rack before it’s secured. Heavy kit high up plus one server pulled out on its rails is how racks tip. Secure first, load bottom up.
- Assuming the rack is deep enough. Measure the longest device plus its rails, cable arm and leads, and allow for the rear door.
- Both power supplies on one PDU. It works on day one and fails the first time that feed drops.
- Switches facing the wrong way for airflow, so they breathe in the servers’ exhaust.
- Leaving blanking panels for later. Later rarely comes, and empty U recirculate hot air.
- Labelling at the end. By then the window is closing and labels get skipped or guessed.
- Long patch leads coiled in the managers, which block airflow and hide where each lead goes.
Most of these come from rushing the last hour of a visit. Book enough time for the tidy-up and labelling, and treat them as part of the job, not extras.
What to put in the ticket
Most delays on rack jobs come from missing information, not difficult work. The table below lists what an engineer needs before travelling.
| Item | Why it matters |
|---|---|
| Rack elevation | Tells the engineer exactly where each device goes |
| Site access details | Badge, escort, loading bay and working hours |
| Delivery status | Confirms kit, rails and leads are on site |
| Power plan | A/B feeds, PDU type and lead connectors |
| Patch schedule | Port-to-port connections and lead lengths |
| Labelling standard | Your naming format and label type |
| Contact on the day | Someone who can answer questions or approve changes |
For jobs in a colocation facility, also check what the provider allows. Many have rules on cardboard on the floor, lifting equipment and working hours. Our data centre support and smart hands service works to the facility’s rules, and engineers can attend under your brand if the work is for your client.
Rack builds across several facilities or countries
The physical work is the same in Frankfurt or Sydney. The logistics aren’t, and they’re what usually slips.
Access and induction
Each colocation provider runs its own access process: named visitor lists, ID checks, inductions, escorts and goods-in hours. Get the engineer onto the access list early, with their name exactly as it appears on their ID, and check whether the site needs notice for out-of-hours work.
Power leads and connectors
PDU input connectors and local plug types vary by country and by facility. Confirm what each site’s PDUs and feeds need rather than assuming the first site’s lead list works everywhere.
Time zones and shipping
If your systems team sits in another time zone, book the visit so the remote checks fall inside their working day, or arrange cover. Kit shipped across borders can also sit in customs for days, so track delivery to the facility itself before confirming the engineer.
For a programme of builds, use one elevation template, one labelling scheme and one report format at every site, so results can be compared side by side. Our engineer network covers 50+ countries, and the global coverage page shows where. The data centre smart hands checklist is a useful companion for the facility side of the brief.
Sign-off and handover
Before the engineer leaves, someone should confirm the devices power up on both feeds, the network links come up, and the remote team can reach management interfaces. Then collect the evidence: photos of the front and rear of the rack, serial numbers of every device installed, the completed patch schedule, and a note of anything outstanding.
Sign off against the plan, not a general impression. The rack is ready when every device sits at the U shown on the elevation, every dual-PSU device is on both feeds, every cable on the patch schedule is connected and labelled at both ends, blanking panels fill the gaps, the doors close and the remote team has confirmed access. Anything short of that goes in the report as outstanding, with a reason, so you can decide whether it needs a return visit.
With us, that comes as a site visit report within 24 hours. If something can’t be finished, such as a missing rail kit or the wrong power lead, the engineer records what’s needed and the return visit becomes a new ticket. For several racks or several sites, our multi-site rollout service runs a pilot first and then works in waves with a daily tracker. For a single rack, a standard field engineer dispatch ticket on an agreed date is usually enough.
Frequently asked questions
How long does a single rack installation take?
It depends on how many devices go in, how heavy they are and how much cabling is involved. A clear elevation, kit already on site and two engineers for heavy servers make the biggest difference to time on site.
Can your engineer install a rack under our company's brand?
Yes. Engineers can work under your brand and badge, use your report template, and they never discuss commercial terms with your end client.
What happens if a rail kit or power lead is missing on the day?
The engineer installs what they can, records exactly what is missing in the site visit report, and the return visit is booked as a new ticket once the parts arrive.
Do you supply the rack, servers or rail kits?
No. Parts and equipment are shipped by you or your vendor. We supply the engineer, the installation work and the report.
Need an engineer to install a rack?
Send one pilot ticket. You get a site visit report within 24 hours with photos and serial numbers, and no minimum commitment.
Book a rack install