

A good network cabinet setup puts patch panels, switches, cable management, power and cooling in a layout that someone else can understand at a glance. That last part matters most. The engineer who builds the cabinet probably won’t be the one who works on it next, so it has to make sense without them.
This post covers how to set up a comms-room network cabinet from scratch, or how to brief someone to do it: choosing the cabinet, laying out the patch panels and switches, managing cables, power and UPS, ventilation and labelling.
Choose the right cabinet for the room
Comms rooms vary a lot. Some are proper rooms with cooling and a locked door. Others are a cupboard under the stairs. The cabinet has to suit the space it’s going into.
- Floor-standing cabinets suit main comms rooms with a full patch field, core switches and perhaps a few servers.
- Wall-mounted cabinets work for smaller floors and branch sites. Check the wall can carry the loaded weight, and that there’s room to open the door fully.
- Open-frame racks give the easiest access and best airflow, but only belong in rooms that are already secure.
Size it for growth. Count the U you need today, add room for an extra switch and patch panel, and remember depth: a cabinet that’s fine for patch panels may be too shallow for a firewall or a small server. Ask for a photo and measurements of the space before the cabinet is ordered.
Network cabinet setup: laying out the U
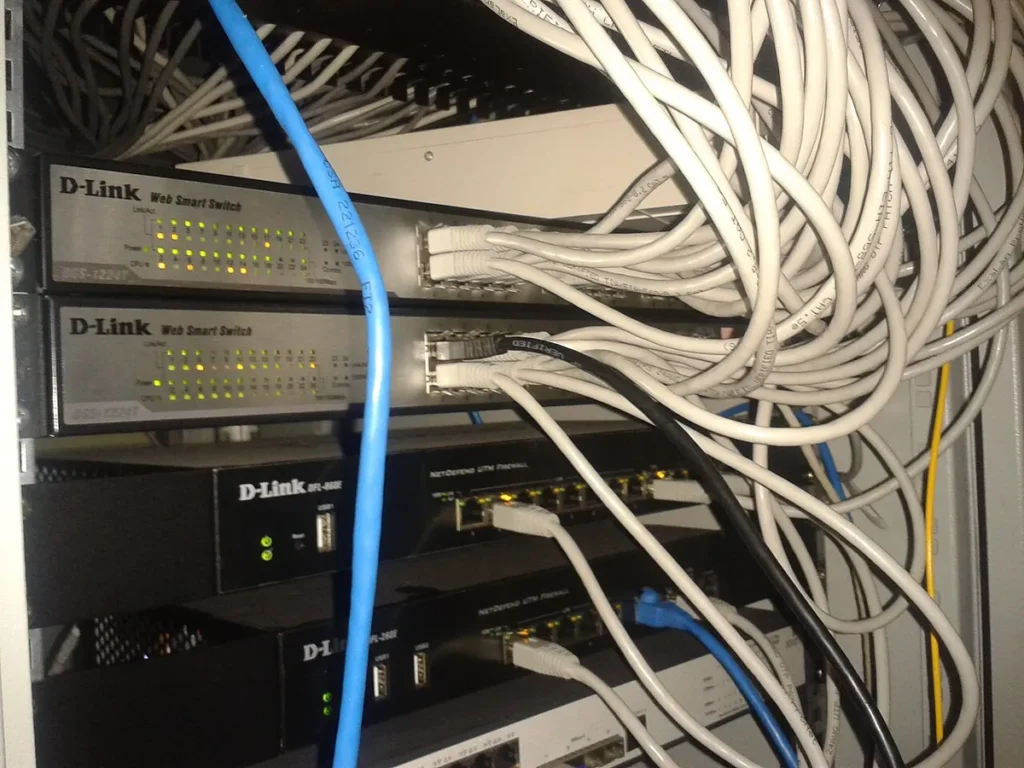
The layout decides how easy the cabinet is to patch and fault-find. A common and sensible pattern for a network rack setup is to interleave patch panels with switches, with a horizontal cable manager between them. Short patch leads then run straight from panel to switch port, and nothing hangs across the front.
A typical top-to-bottom layout looks something like this:
| Position | Typical contents |
|---|---|
| Top | Fibre patch panel or ISP termination, router |
| Upper middle | Copper patch panels, interleaved with access switches and cable managers |
| Middle | Firewall, core or aggregation switch |
| Lower | Shelf for small devices, spare U |
| Bottom | UPS and batteries |
Adjust it to where the cables enter. If horizontal cabling comes in from the ceiling, the patch field at the top keeps runs short. If it comes up from a floor void, you may want it lower. Heavy items, especially the UPS, always go at the bottom.
Patch panels and switches
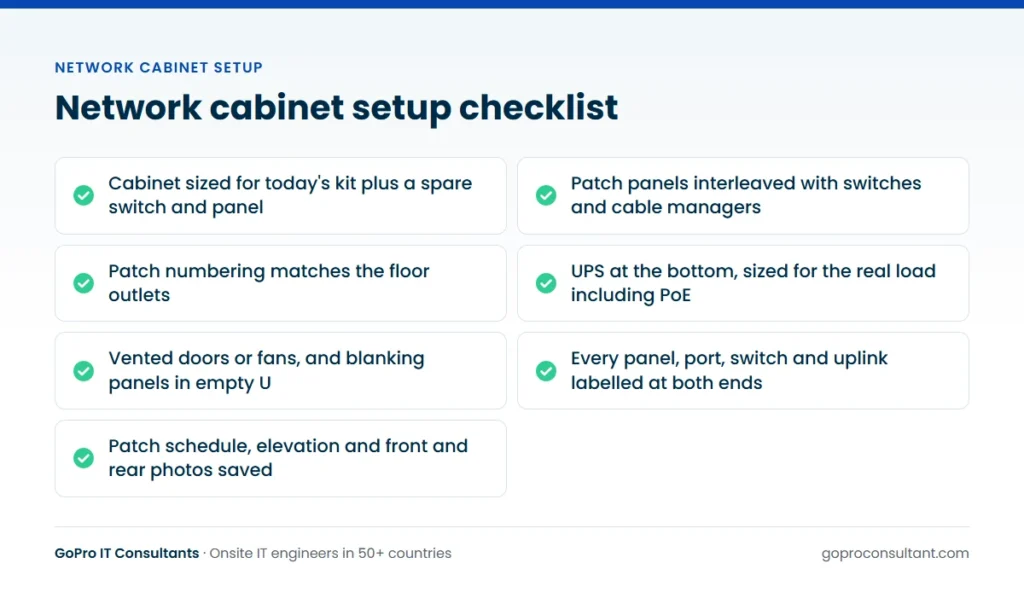
Patch panels should be numbered in a way that matches the outlets on the floor. If outlet 2-047 on the second floor goes to panel B port 23, someone with no documentation should still be able to work it out from the labels. Agree the numbering scheme before the cabling contractor terminates, not after.
For switches, think about what you’ll ask an engineer to do later. Leave the console port reachable. Note which ports are uplinks and which carry PoE for phones, access points or cameras, because PoE affects your power budget. Check the switch’s airflow direction, because some front-to-back models suit a cabinet better than others. If the switch install is part of the job, our post on network switch installation covers the on-site steps.
Keep the configuration side separate from the physical work. The usual pattern is that your network team prepares the switch config, the on-site engineer mounts and cables it, and your team brings it up remotely while the engineer is still there to move a lead if needed.
Cable management that stays tidy
Cabinets rarely start messy. They become messy over months of quick changes with whatever lead was to hand. You can slow that down with a few habits built in from the start:
- Use the shortest patch lead that works. Stock a few standard lengths and colours on site.
- Fit horizontal managers between each panel and switch pair, and vertical managers down the sides.
- Use hook-and-loop ties, not cable ties pulled tight. They’re easier to undo and kinder to the cable.
- Keep power cables away from data where you can, ideally on opposite sides of the cabinet.
- Agree a colour scheme (for example, one colour for user ports, one for phones, one for uplinks) and stick to it.
- Leave the cabinet with no spare leads hanging and no unused leads left plugged in.
The cabling behind the patch panels matters too. If the horizontal cabling is new, it should be installed and tested to a recognised standard before the cabinet is dressed. Our guide to structured cabling installation covers that part.
Power, UPS and ventilation
Most comms-room cabinets have a rack-mount PDU and a small UPS. Size the UPS for the real load, including PoE, and decide how long it needs to hold up the network. If phones run on PoE, a short power cut without a UPS takes the phones down too. Ask the engineer to record which device is on which outlet, and to confirm the UPS isn’t showing faults or a battery warning.
Heat is the problem people forget. A closed cabinet in a small room with no cooling can get hot enough to shorten equipment life or trigger shutdowns. At minimum, check the cabinet has vented doors or fans and that the room isn’t sealed with no air movement. Fit blanking panels in empty U so hot air isn’t pulled back to the front. If the comms room is a converted cupboard, raise it with the site early rather than after the first summer.
Security and the room itself
A comms cabinet in a shared space needs a lock, and someone needs to know who holds the key. Record the key holder in your site notes, because an engineer who arrives to find a locked cabinet and nobody who can open it has a wasted visit. Keep the room clear of storage, too. Boxes of printer paper stacked against a cabinet’s vents are a common sight, and they block airflow as well as access. If the cabinet has a temperature sensor or the UPS reports environmental data, make sure someone actually receives the alerts.
Labelling and documentation
If the cabinet is labelled well, fault-finding is quick and a remote team can direct an engineer port by port. If it isn’t, every visit starts with tracing cables. A sound labelling scheme covers:
- The cabinet itself, with a name that matches your documentation.
- Every patch panel and every port, matched to the floor outlets.
- Every switch, front and rear, with hostname.
- Uplinks and fibre, labelled at both ends.
- PDU and UPS outlets.
Then keep a patch schedule and a cabinet elevation, and update them every time something changes. Ask for front and rear photos at the end of every visit. They’re the quickest way to check what’s really in the cabinet without sending anyone.
Who does what in a comms room
A new cabinet often brings several trades into one small room. Problems usually start at the hand-offs between them, so write the split down.
| Party | Typical part in the job |
|---|---|
| You (MSP or integrator) | Cabinet standard, elevation, labelling scheme and the ticket |
| End client or landlord | Room access, power circuit, cooling and the key holder |
| Cabling contractor | Horizontal cabling, termination on panels and test results |
| ISP or carrier | Line delivery and their router or termination equipment |
| Network team | Switch and firewall config, remote bring-up and checks |
| Field engineer | Mounting, patching, dressing, labelling, photos and report |
The order matters as much as the names. The cabinet and power go in first, the cabling contractor terminates and tests, the ISP installs its line, and only then does the engineer mount active kit and patch. Booking the engineer before the cabling is tested usually means a second visit.
A typical branch cabinet build
Say you’re fitting out a new branch office with a wall-mounted cabinet. It’ll hold the ISP’s router, a firewall, one PoE access switch, a copper patch panel for the desk and ceiling outlets, and a small rack-mount UPS. The cabling contractor has already terminated and tested the outlets.
Before the visit, you confirm the wall has been checked for the loaded weight, the cabinet is deep enough for the firewall and UPS, and there’s a dedicated power socket inside or beside it. You send an elevation: ISP router and firewall on a shelf or ears at the top, patch panel below, a cable manager, the switch under that, spare U, and the UPS at the bottom. You also send the patch schedule, with each outlet mapped to a switch port and VLAN.
On the day, the engineer mounts the UPS first because it’s the heaviest item, then the patch panel, cable manager and switch, and finally the firewall and router at the top. They patch the outlets with short leads in your colour scheme, connect the ISP hand-off, and plug everything into the UPS. Your network team brings the firewall and switch up remotely, and the engineer tests a sample of outlets from the floor. Front, rear and close-up photos of the labels go in the report.
The usual snag is the ISP. If their line or router isn’t live, everything else can be built but not tested. Check the line’s status a day or two before, and decide in advance whether the engineer waits or the test becomes a later remote task. For the wider office build around the cabinet, our guide to office network setup covers what comes before and after.
Tidying an existing cabinet without an outage
Many cabinet jobs aren’t new builds. They’re a rescue of something that grew messy over years. The work is safe if it’s planned, and risky if someone just starts pulling leads.
- Survey first. A short visit to photograph the cabinet front and rear, record which panel port goes to which switch port, and note any unlabelled kit. Decide from that whether it’s a tidy or a rebuild.
- Capture the logical side. Your network team exports port descriptions, VLANs and MAC address tables so every live port can be matched to a device afterwards.
- Draw the target layout. New elevation, cable managers added where missing, lead lengths and colours agreed.
- Book a window. Out of hours or at a quiet time, with the network team available remotely for the whole slot.
- Work one panel at a time. Replace leads for a block of ports, check them against the record, then move on. Never unplug a whole switch at once.
- Test and update. The network team checks ports and services after each block. The patch schedule and photos are updated before the engineer leaves.
If the tidy turns up dead kit, unknown devices or cables that go nowhere, the engineer records them rather than removing them on the spot. Unknown isn’t the same as unused, and a forgotten cable can be an alarm line or a building system. Old equipment you do decide to retire can go through IT asset disposition with certified recycling partners.
Common cabinet mistakes and what a finished one looks like
The mistakes are predictable. Cabinets bought for today’s kit with no spare U. Patch panels mounted far from the switches, so every lead crosses the front. Managers left out to save a few U, which is exactly the space you’ll want back once the leads start piling up. A UPS bolted halfway up because that’s where the gap was. PoE switches added without checking the UPS can carry them. And labels written by hand in marker, which fade or get rubbed off within a year.
A finished cabinet is easy to recognise. Every device sits where the elevation says. Every lead is the right length, in the agreed colour, and routed through a manager. Every panel port, switch and uplink is labelled with printed labels that match the documentation. Empty U have blanking panels, the doors close, the UPS shows no faults, and the network team has confirmed the switch and firewall are reachable. The report has front and rear photos, serial numbers and the updated patch schedule. If you can hand those photos to an engineer who has never seen the site and they can find a given port in a minute, the job is done properly.
Getting the work done across sites
A network rack installation guide is only useful if the person on site follows it. If you’re setting up cabinets across several offices or stores, write one standard, prove it on a pilot site, then repeat it. Our multi-site rollout service works that way, with a daily tracker showing photos and serial numbers from each site.
For a single cabinet build, tidy-up or switch swap, a field engineer dispatch ticket on an agreed date (including nights and weekends) keeps disruption down. If you want ongoing help running the network once the cabinet is in, see our managed network services. Either way, the engineer can work under your brand as part of our white-label IT services, and you get a site visit report within 24 hours with photos and anything outstanding.
Frequently asked questions
Can an engineer tidy an existing messy cabinet without causing an outage?
Yes, with planning. Book it out of hours, photograph and record every connection first, and have your network team on hand to check services as leads are moved.
Will the on-site engineer configure our switches?
Usually your network team prepares the configuration and brings the switch up remotely, while the engineer mounts, cables and moves leads as directed. Agree the split in the ticket.
Do you supply the cabinet, patch panels and leads?
No. Equipment and parts are shipped by you or your vendor. We provide the engineer, the installation work and the report.
How much spare space should a new cabinet have?
Allow room for at least one more switch and patch panel pair, plus a cable manager. Running out of U is one of the main reasons cabinets get messy.
Need cabinets built or tidied on site?
Our engineers build and dress comms-room cabinets under your brand, with a site visit report within 24 hours. Start with one pilot ticket.
Book an engineer